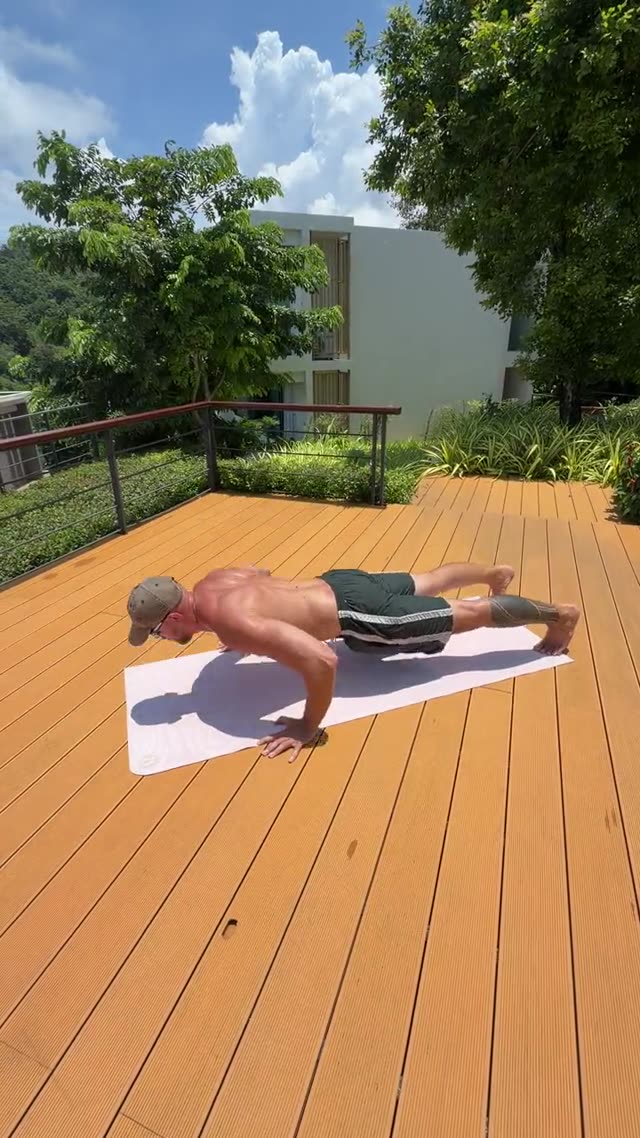
Push-up progression for beginners: from your first incline rep to a full push-up
A push-up progression for beginners: five steps from incline push-ups to full reps, form cues, a weekly plan and the mistakes that stall you. Start today.
 Sergey Titov 7 min read
Published · updated
A push-up progression for beginners exists because the full push-up is not a starting point. It is the middle of a ladder. Nobody expects to bench press their body weight on day one, yet most people drop to the floor, grind out two crooked reps and decide push-ups are “not for them”. I have coached this movement more than any other in home programs, and the pattern is always the same: the person is not weak, they are starting three rungs too high. Below is the five-step ladder I give every beginner, the test that tells you which rung is yours, the form points that make each rep count, and a three-day weekly plan that gets most people to a clean full push-up in six to eight weeks.
What you will get from this guide
- Why push-ups fail, and which of three weak links is yours.
- Push-up form in four checkpoints: hands, elbows, trunk and range.
- A five-step progression with a clear rule for moving up.
- A weekly plan built from the Forma library, and how the app fits it to you.
- The mistakes that stall beginners and a two-month progression plan.
Push-up progression for beginners: why the floor is too hard at first
Measured on a force plate, a full push-up loads your hands with roughly 60 to 70 percent of your body weight, and you hold a plank the entire time. Failure comes from one of three places, and each needs a different fix.
- Chest and triceps strength. You go down and cannot come back up. Fix: raise your hands onto a surface to reduce the load, then build volume.
- A collapsing trunk. The lower back sags, the hips drop and the body snakes up behind the arms. Fix: the plank and its variations until 45 seconds feels easy.
- Shoulder control. Elbows flare out, shoulders creep toward the ears, wrists ache. Fix: technique work and slow negatives.
Most adults who have not trained in years have all three at once. That is why the ladder below builds strength, trunk and technique together rather than one at a time.
Push-up form: four checkpoints
Beginners lose the rep on the same details every time. Check each one before you add repetitions.
Hands and elbows
Palms under the shoulders or slightly wider, fingers pointing forward or a little out. Elbows travel back at about 45 degrees to the torso, not out to the sides at 90. Imagine screwing your palms outward into the floor; the shoulders stabilize on their own.
Trunk and hips
One straight line from the back of the head to the heels. Squeeze the glutes and brace the abs before the elbows bend, and keep them tight until the rep ends. If the lower back sags, you are doing a back bend, not a push-up.
Range of motion
Down until the chest is a hand’s width from the floor, up until the elbows lock out. Half reps do not count, because they skip the hardest part of the movement.
Tempo
Two seconds down, a brief pause, one second up. The slow lowering phase is a strength workout of its own, and it works even on the days you cannot press back up yet.
The five-step push-up progression
You pick a step by test, not by feel: the right rung is the one where you can do 8 clean reps with the form above. The rule for moving up is three sets of 12 with 60 seconds of rest.
| Step | Exercise | What makes it easier | Move up at |
|---|---|---|---|
| 1 | Incline push-ups, high surface (table, counter) | The steep angle removes about half the load | 3 × 12 |
| 2 | Incline push-ups, low surface (chair, sofa) | Smaller angle, load closer to full | 3 × 12 |
| 3 | Knee push-ups | Shorter lever, but the trunk already works as in the full rep | 3 × 12 |
| 4 | Negative push-ups from the floor | Only the 4 to 5 second lowering; come back up through the knees | 3 × 5 |
| 5 | Push-ups | The full movement | 3 × 8, then harder variants |
Steps 1 and 2 differ only in the height of the surface, which is convenient: there is always something in your home ten centimeters lower than the last thing. Step 3 is the one that matters most; knee push-ups load the arms almost as much as full ones, and when Forma calculates your fitness index it counts a knee push-up as roughly 60 percent of a full rep. Many people skip step 4, which is a mistake: negatives teach the hardest part of the range, the bottom.
Once full push-ups reach 3 × 12, add diamond push-ups for the triceps and pike push-ups for the shoulders. The library lists both as harder variants of the standard push-up.
The weekly plan
Three short sessions a week on alternating days. Each one starts with a warm-up: 30 seconds of arm circles, 8 cat-cows and 5 inchworms.
Day A, strength. 4 sets of push-ups at your current step, 6 to 10 reps, 90 seconds of rest. Then 3 sets of 10 supermans for the upper back, 45 seconds of rest.
Day B, trunk and technique. EMOM 8 minutes: odd minutes, 30 seconds of plank; even minutes, 8 plank shoulder taps. Then 3 sets of 3 to 5 negative push-ups with a five-second descent, 90 seconds of rest.
Day C, volume. 5 sets of push-ups one step below yours, 10 to 12 reps, 60 seconds of rest. Finish with 2 sets of 8 bench dips off a chair.
If you own a resistance band, add 3 × 12 band rows on any day. A strong upper back keeps the shoulders in place instead of letting them roll forward.
How the app scales the plan. There is no max test at the start: on first login you answer a few questions, and Forma sets your starting level from them. After your second workout the app offers a short test, asking roughly how many push-ups, full or on your knees, you could do without going to failure. Forma refines your fitness index and level from it; push-ups carry more weight in that index than any other movement, and from then on the rating after each session adjusts the volume. If you are at level 1 and choose “easier” before a session, every push-up in the plan is swapped for knee push-ups, and level-3 movements such as diamond push-ups are always swapped for a level-1 athlete: the app walks the “easier” chain up to two steps. “Easier” also drops a set from one or two of the biggest blocks and trims the reps by about 10 percent; rest between sets stays the same. After the session you rate the effort from 1 to 10; finish the plan and rate it 6 or lower, and the next session grows by 5 percent.
Common mistakes
- Starting on the floor. Two crooked reps three times a week build neither volume nor technique. Drop to the step where you get 8 clean ones.
- Elbows out. That loads the shoulder joints, not the chest. Keep them at 45 degrees.
- Testing your max every day. A max is a test once every four weeks, not a workout.
- Ignoring the trunk. If you cannot hold a plank for 30 seconds, the push-up will wait.
- Climbing too early. The 3 × 12 rule exists so the next step does not turn into the same two crooked reps.
- Wrist or shoulder pain. Burning muscles are normal; sharp joint pain is not. Try fists or dumbbell handles under your hands, shorten the range, and if the pain keeps coming back, talk to a doctor.
How to progress
- Weeks 1 and 2. Find your step and train three times a week. Use the top of the rep range only when form holds.
- Weeks 3 and 4. Add one rep per set each session until you reach 3 × 12. Move up a step and restart at 6 to 8.
- Weeks 5 to 8. Negatives from the floor in every Day B. The first full push-up usually shows up here, for some people earlier.
- After that. Once 3 × 12 full push-ups feel steady, change the stimulus: diamond push-ups, a two-second pause at the bottom, pike push-ups. ACSM recommends resistance training for the major muscle groups on at least two days a week; three short sessions like these fit comfortably.
To see how these sessions fit inside a complete program, read the beginner’s guide to CrossFit at home. For how EMOM and AMRAP formats work with push-ups, see the breakdown of workout formats.
Wrap-up
Learning the push-up is not about talent; it is about the right step and eight weeks of patience. Hold the four checkpoints, move up by the 3 × 12 rule, and train the trunk as seriously as the arms. If you would rather have the step, the volume and the substitutions picked automatically from your test, open the Start: home CrossFit basics course: knee push-ups progress there from the first workout to the twentieth without any arithmetic on your side.
FAQ
Where do I start if I cannot do a single push-up?
With incline push-ups against a high surface such as a table or a kitchen counter. Find the height where you can do 8 clean reps and train there three times a week until you reach three sets of 12.
Do knee push-ups count as a real exercise?
Yes. They are step three of the progression, not a lesser version. They load the arms almost as much as full push-ups, and Forma counts a knee push-up as roughly 60 percent of a full rep when it calculates your fitness index.
How many days a week should I train push-ups?
Three short sessions on alternating days: one for strength, one for the trunk and negatives, one for volume a step below your current level. That is enough to progress and leaves time to recover.
When should I move up to the next step?
When you complete three sets of 12 with 60 seconds of rest and your form holds in the last set. On the new step start again at 6 to 8 reps per set.
What if my wrists hurt during push-ups?
Put your hands on fists or on dumbbell handles so the wrist stays straight, and shorten the range for now. If sharp joint pain comes back session after session, talk to a doctor.